Online Jewelry Training Classes for Metalsmiths

This is a jewelry making tip for using the minimal amount of solder necessary to create a clean neat solder joint.
Firstly the piece to be soldered is flooded with a small piece piece of solder. The solder is then filed down to a minimum. Then the piece is placed on the joining surface and softly heated up until the solder flows.


Sometimes a solder joint is needed that has no excess solder.
For instance when one makes a hinge or a gemstone with tight tolerances.

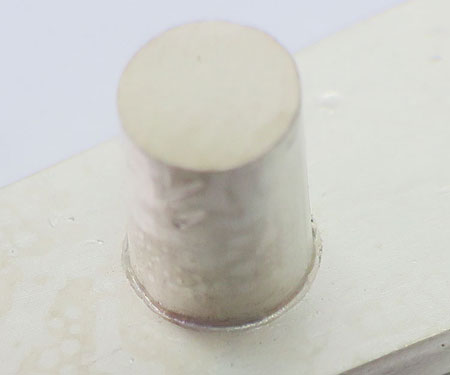
For this example, I cut a piece of wire 3 mm in diameter and about 4 mm long.
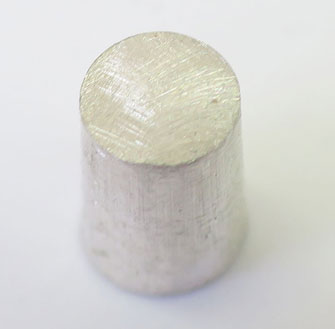
I file the top flat and sand it down to 220 grit.

I place a piece of solder on it, that I know will flood the entire top.

I flux the solder and melt it.
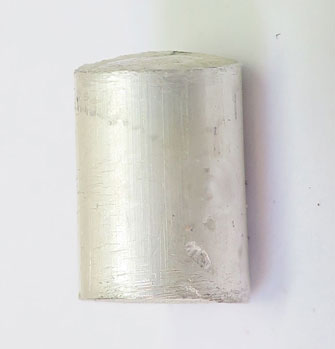

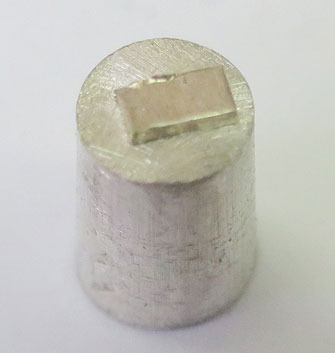
Here you can see the bulge of solder.
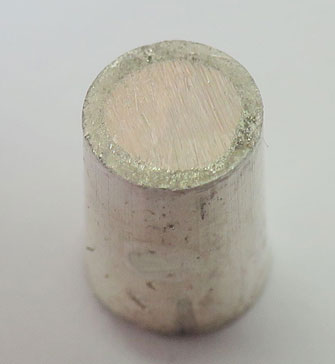

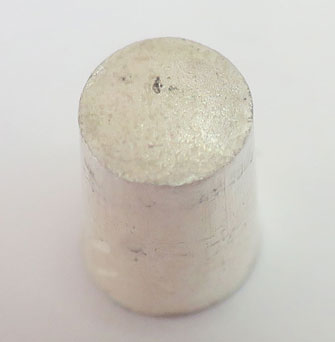
Now, I use a fine file and file the solder back until only a thin layer is left.
It takes a bit of practice to learn how to judge the amount of solder that has to remain.

Now I place the rod on my back plate solder down, flux and heat everything to melting temperature.
This is a short video clip showing how I heat the piece up and let the solder flow.
When the correct amount of solder is left over after filing down, it makes for a very neat joint.
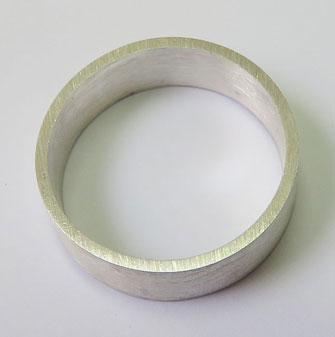

Here I am going to solder a ring /bezel onto a plate.
First I file the surface to be soldered flat and sand it down to 220 with my buff stick.


I add flux to small pieces of solder that I perch on the edge of the bezel.
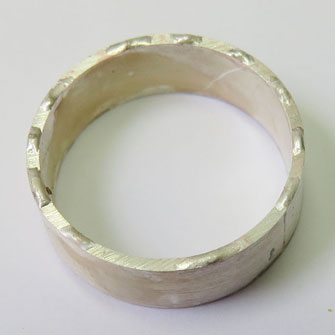
The trick is now to apply just enough heat to partially melt the solder on the edge.
Should the solder melt and run down the side, no matter, as long as it is filed off before bezel is soldered to the back plate.
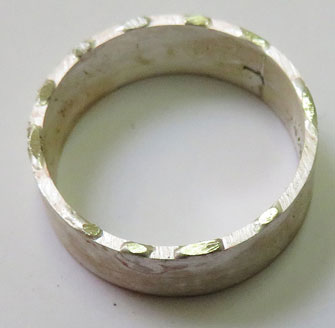

Now I file the solder back.
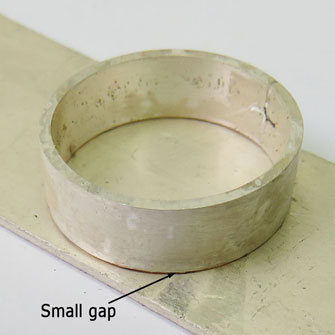

When the bezel is placed on the back plate, a small gap can clearly be seen.
Now the piece is fluxed and heat is applied evenly using small circular motions.
More of the heat is applied to the bottom plate, because it is larger and heavier.
When the solder reaches melting temperature, the bezel with sink down and 'flash' around.
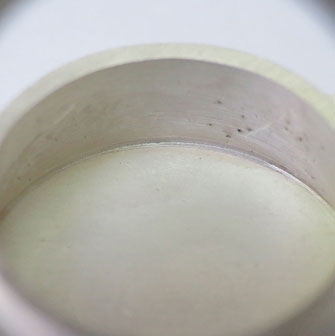

The inside of the bezel with no excess solder.
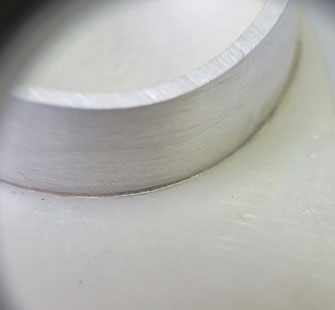

The outside of the bezel also has no excess solder.
Click the link to receive your free PDF version on Using Minimal Amount Of Solder which will be emailed to you within 4 - 12 hours.
or select other projects from Jewelry Making Tutorials List
If you have any questions or wish to be notified of any new tutorials that are posted, email me.
This content is the intellectual property of Hans Meevis. More information on our Copyright and Privacy Policy


