Online Jewelry Training Classes for Metalsmiths

A bezel setting has a thin metal rim covering the gemstone. The metal is folded over with a pusher, then finished off with a pumice wheel and a graver. The trick is not to cover the gemstone with too much or too little metal.
Also, the stone must be set in a manner, that it doesn't rock or rattle in the setting.
This is a very secure setting. Another benefit is that this type of setting is practical because it doesn't catch on clothing.
This free tutorial follows the same format as all my premium tutorials.
This gives you a good insight into the technical teaching methodology.


For the purpose of demonstrating this technique, I start with a stock piece of silver tubing with a 6.3 diameter.
I first drill the center out to 3 mm.

The round stone I am setting is 5 mm in diameter.

To enlarge the center hole in the tubing, I am using a 5.5 mm ball frazer.
The reason the ball frazer is slightly bigger than the diameter of the stone, is because most stones are not perfectly round, so the extra size picks up that slack.
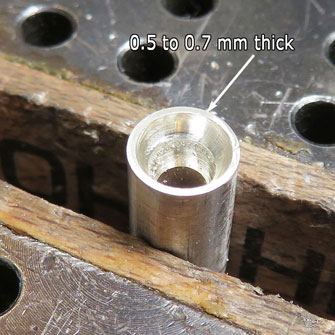

The top of the tube walls should be in between 0.7 mm to 0.5 mm thick.


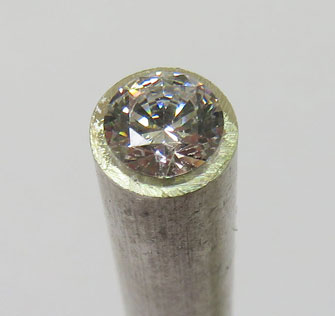
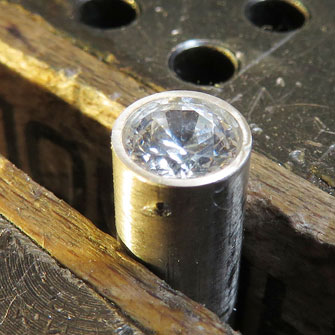
I expand the center with the ball frazer until the stone lies in the tube with the table of the stone nearly level with the top of the tube.
If the table is too high there will not be enough metal to fold over and if the table is too low there will be too much metals and it will hide a lot of the stone.
The art of setting is to have the minimum amount of metal holding the stone safely.

I am using a clamp for demonstration purposes.
Normally, the tube is attached to a jewellery piece of some form or another.
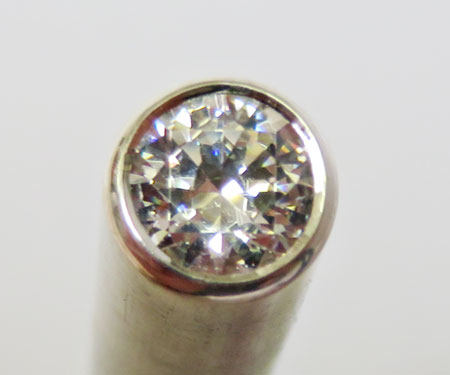
I insert the stone and make sure that it lies perfectly level.


I use my setting pusher held at about 45° and push down on one side of the tube.
I push down just enough, so as not to move the stone off from level.
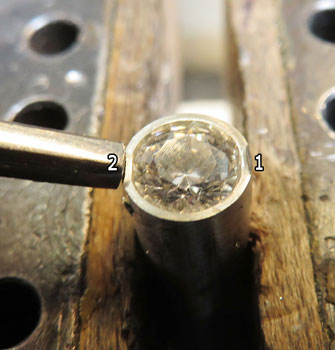

Then I turn the tube around and I push Nr. 2 down on the opposite side of Nr.1, with as much pressure as I pushed from the first side.


Now I push down on No. 3 and 4 and this should then clamp the stone in place.
If the stone is not clamped, I repeat the process.


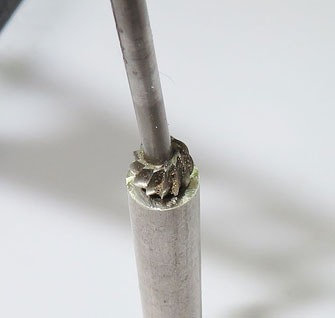
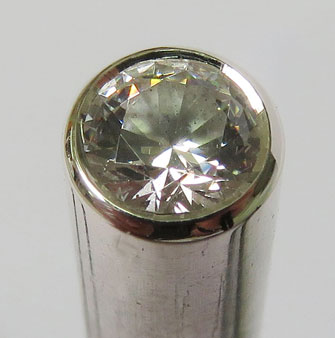
Once the stone is clamped in place, I push down on the next four corners, forming the eight sided look as in the picture.


By pushing down on alternate sides, eventually the walls of the tube are forced down over the entire girdle of the stone.


The more is pushed, the smoother the fold over section gets.


The folded over metal is then smoothed off with a No 5 escapement file or equivalent.


To remove the file marks from the folded over metal, I use a pumice rubber wheel.
These are obtainable the the jewelry supply shops in a coarse and fine grit.
The advantage that these wheels have over the traditional silicone wheels is that they don't scratch the stone.
They remove the metal but leave stones that are harder than 4 on the Mohs scale untouched.


The final finishing off, the bright cut is done with a flat graver.
The inner edge is cut away in a smooth soft motion with a flat graver.
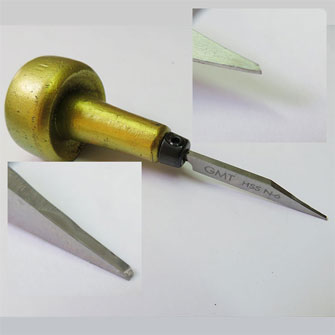

The bottom of the graver is super smooth so when it cuts, the surface look like is has already been rouged.


I use an Edenta polishing wheel for polishing the bottom of the graver.


I make a brass pusher out of some 3 mm brass welding rods.
I make a steel pusher, the same as my brass pusher, out of a mild steel nail.
The tip are sanded down to 1200 with my buff sticks.
I have a free tutorial on how to make buff sticks.
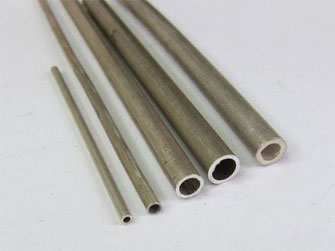

One can also make your own tubing.
I have a free tutorial on how to make tubing.

After a ligh polish, the setting is complete.
Click the link to receive your free PDF version on Bezel Setting with Pusher which will be emailed to you within 4 - 12 hours.
or select other projects from Jewelry Making Tutorials List
If you have any questions or wish to be notified of any new tutorials that are posted, email me.
This content is the intellectual property of Hans Meevis. More information on our Copyright and Privacy Policy


