Online Jewelry Training Classes for Metalsmiths


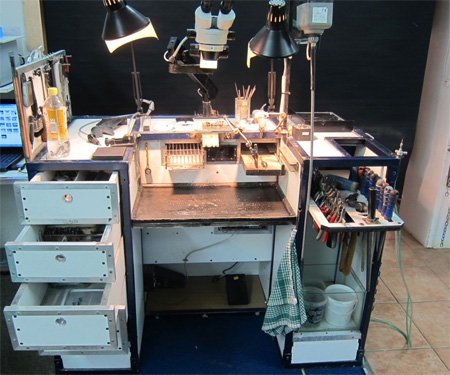
I have moved a lot in my life and I got tired of building a new workshop every time, so I started making a mobile bench about 26 years ago.
I wanted the bench to be sturdy when using the roller and drawing wire. A lot of planning went into optimizing the use of space and considering time and motion in work flow.
My goal was to have no protruding parts and be able to detach any fittings on the top of the bench to make transport easy.
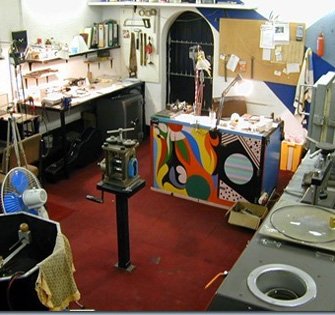
This was my second mobile jewelers bench. I never took pictures of my first one.
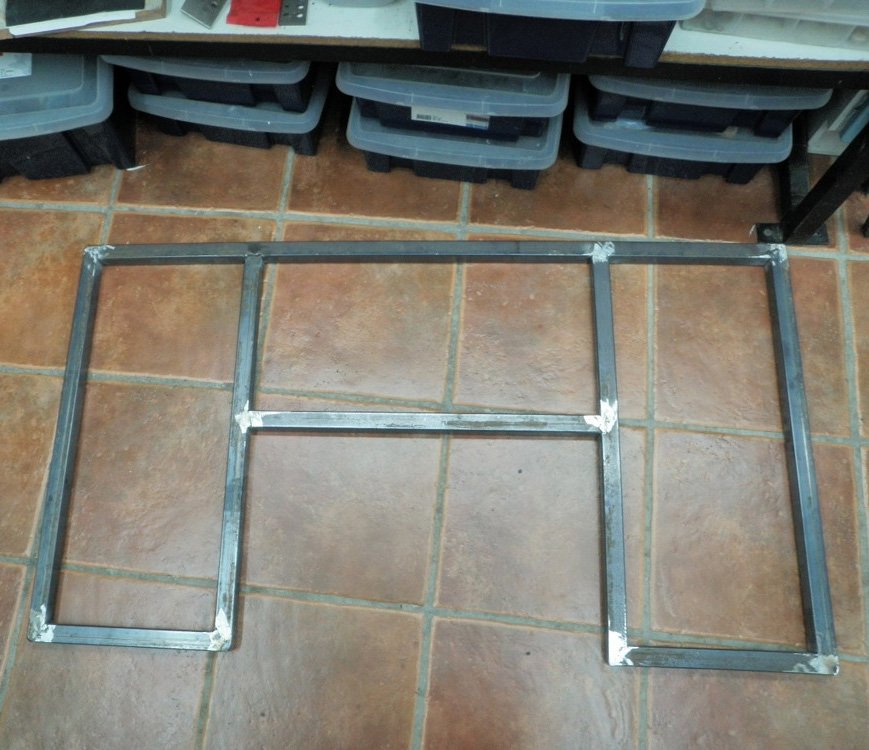
This portable workbench was the last one I built and which I use daily.
The frame is made out of 30mm hollow steel tubing.
Two shapes like this, one top and one at the bottom.

And the base framework of the bench.
I made small pieces of tubing so that the top and bottom can be taken apart.
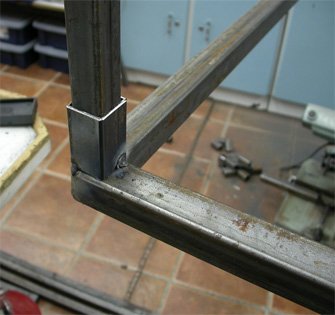
The corner struts are fitted in and later I bolted then together.
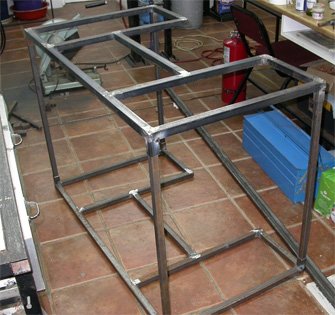
The basic frame of the jewellery workbench coming together.
I made the entire bench so that everything can be taken apart.
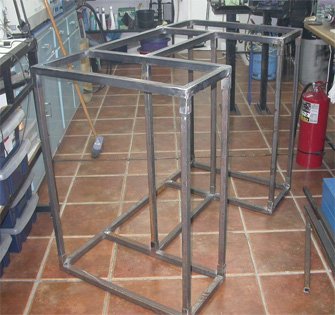
With the center struts also in place.

Here I am welding the table top strip supports.
When I fit the melamine wood, I want every ‘cell’ to lie lower than the steel frame.
That way, nothing can roll off the bench.
So basically, the steel is 30 mm square and the wood is 25 mm thick, leaving a 5 mm ridge around the three ‘cells’ of the bench top.

I made a potent wheel system so that it can be raised and wheeled to another place.
The square bar at the side is lifted and locked into place.

I can lift the bench fully laden with the roller in place.
When it is lowered it sits tight on the ground, because it is so heavy.

Frame with the drawer guides in.
This bench works on the KISS principle.

I painted the frame metallic blue and fitted the roller.

Building the extraction and filter system for the polishing motor.

Fitting the rotary extractor fan.

At the top is a removable filter. It really sucks well.
At the side bottom there are two input plugs for electricity.
The middle brown shelf part has a drawer that stores all the polishing buffs.

I used an Abbot and Ashley motor to polish and grind.
At 2800 rpm, it’s got serious grunt.
Behind the buff is the detachable filter unit.

The other side has got a 150 mm grinding wheel on.
On the side so the grinding stuff doesn’t interfere with the polishing buffs.

The front of the jewelers bench has drawers for storage of the less used tools , polishing buffs,and a Gravermax access door.

When everything is closed, nothing sticks out.
The holes are the handles—you stick your finger in and pull them open.
Rare earth magnets act as catches to hold everything closed.
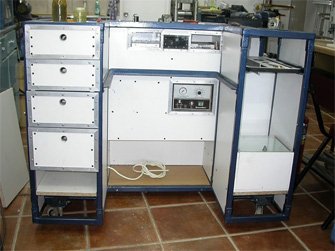
I use sliding everything on my portable workbench

This is my acid station.
Bi-carb on the left, sulphuric acid in the rear and Sodium-bisulphate on the right.
It has a sliding cover over it.
The inside is glass and silicone.
It doesn’t mess at all.
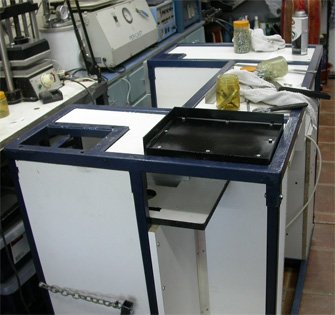
The black square is my melting area.
It has a steel top and a soldering pad underneath for insulation.

This is the front access door to my Gravermax.
The picture was taken while I was wiring everything up.
The gold square at the top left is a quick connection for the Gravermax’s air compressor.

Just because I can, I made a brass fitting.

The front of my Gravermax is underneath my sliding gold catchment tray.
I not a great fan of pouches for metalsmith benches. Everything ....tools, diamonds gold collect in one pile. They waste time and space.

I made a detachable side panel.

The panel slots in like this.
The two switches at the left bottom are the master switches for the polishing system and the rest of the bench.

It hangs all my most used tools.

Below my melting square is space for my oxygen and propane tanks.
I am using external tanks at the moment.

Door of propane oxygen tabk cubicle closed.
Everything slides.
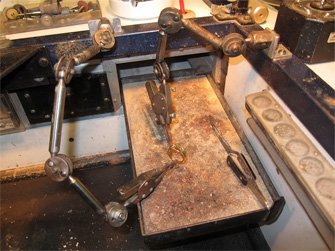
This is my soldering station.
I have two third arms, (GRS) one of which I made a third ball joint so it is more articulative. ( new word)

A close-up of my solder holder is on the right.
It has a flip up lid so that my cockatiel does not eat the solder pieces.

This is my burr tray.
Everything has it’s place.
The burrs fit into a clear 6 mm sheet of Perspex.
Below the Perspex is a sheet of paper which annotates the size or type of burr that goes into the correct hole.
This is not an OCD thing.
It is simply that I don’t waste time looking for a burr, and it cuts my work time down to the minimum effort.
How to Mark Burrs and more on Organizing a Burr Tray.
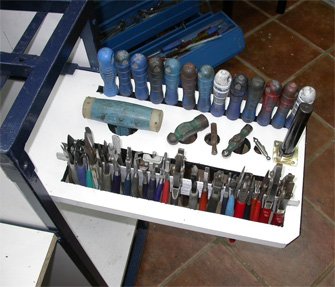
This is my slide out for all the immediate tools needed.
Pliers, files with the handles marked to indicate what file it is, five hammers and my main triblet.
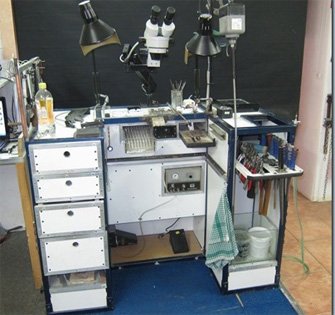
This is the bench as it stands today.
I have been working for seven years on it already.
This picture with the gold tray removed and the microscope was added.

The top drawer contains buff sticks and Gravermax and hand setting tools.
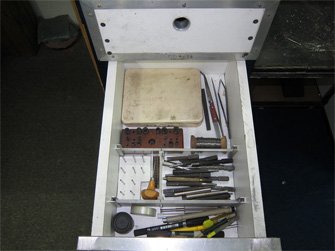
The second drawer beading tools, pens and setting stuff.
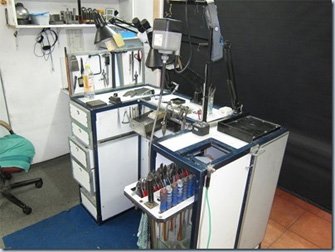
Everything on the top workbench surface is detachable, including the hanging motor support and the lights as well.
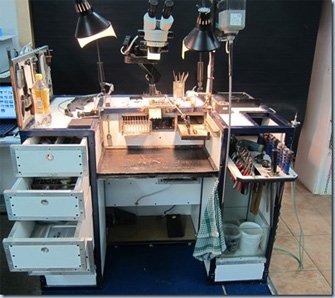
Here with the gold tray in in place.
The second and third drawers contain gold and silver stock like plate, bars and wire.
The two foot pedals are for the Gravermax and hanging motor.
The overall dimension are 1250 mm long, 700 mm deep and 900 mm high.
The middle cutout is 580 mm wide and 350mm deep.
The tray is 670 mm high from the ground.
And I don’t hit my knees at all.

Recently the roller was placed on my jewelers mobile bench as originally planned.

Setting.
I like black to show up gold and diamonds.
But I will spray paint the tray to a different colour like purple just because.

Sawing peg.
I use GRS everything.
I have the roller on a separate stand at the moment.

I use two architectural lights with 100w reflectors in.
I lines the inside with aluminum foil so the covers don’t get so hot.
If I pitch at a new place all I need to do is plug the bench in and I can make jewelry right away.
or select other projects from Jewelry Making Tutorials List
If you have any questions or wish to be notified of any new tutorials that are posted, email me.
This content is the intellectual property of Hans Meevis. More information on our Copyright and Privacy Policy