Online Jewelry Training Classes for Metalsmiths


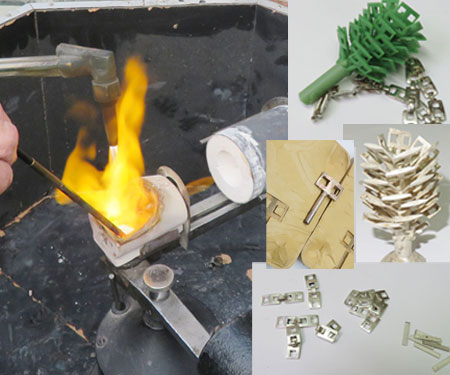
This is the step by step process on how to replicate a base metal chain into precious metal using the lost wax casting method.
Start with silver that is cast into a plate and then rolled to the correct thickness.
Take into consideration that the thickness of the new master chain link must a bit thicker than the sample chain link.
Calculate extra thickness for the plate, because there is shrinkage in the mold making, wax injecting and casting with finishing off that causes the final model to be about 3% smaller than the master.
Since this chain link model is a straight forward H, I can draw the design directly on the metal.
I use a Sharpie and then trace the design into the black.
I pierce out the chain link design using a 3/0 saw blade.
I use a titanium saw frame that I designed and make.
The basic link shape. It must still be filed down a lot.
Working towards the taper.
Curved and tapered and sanded down ready to solder the joiner bar in.
I always solder on the sprues, because then there is no movement during the vulcanizing process. The brass former fits the injectors nozzle.
Setting out the rubber for the vulcanizer.
Rubber packed into the mold frame
And into the vulcanizer. The rubber slices heat up to about 150° C and then become liquid. When it cools down, the mold is pure rubber.
I cut the mold open using a new scalpel blade.
I also cut some locks in each corner.
Now I let the injector heat up to about 70° C and a pressure of about 5 bar.
Extracting this wax model is not difficult, because it is nice and flat with no undercuts.
I always inject more than I need and I cast more than I need, so that if there is a incomplete casting, I have spare links.
Now I build the wax tree.
The center rod can be rotated and I use a solder gun to heat the wax up.
The wax tree built.
The wax tree is inserted into the rubber former for the flask.
The flask is then fitted over the wax tree.
I use a copper sheet to raise the lever of the flask temporarily.
When the plaster is added and the flask is vacuumed to remove all the bubbles, the plaster rises under vacuum. So the copper keeps it from spilling over and creating an unholy mess.
A flask like this takes 850 grams of powder.
I mix 340 grams of water by weight because it is easy.
The flask in the vacuum machine.
The level the plaster slurry rose under vacuum can clearly be seen.
Once the plaster has set and is hard, the rubber former at the bottom is removed.
The cup shape at the bottom is so that the molten metal is directed into the plaster mold after burn out.
The flask is placed into a oven and is slowly heated up to about 650° C over five hours.
The flask is then cooled down to about 450°C just before casting.
After the wax is burnt out from the flask
( 4 hours to 650°C ) and then 700 for and hour then 500 for until I become impatient.
I wind the spin caster twice.
I heat the 150 grams of silver to melt and the release the spin caster from it's hold.
The spin caster spinning.
The centrifugal force of the caster is about 50 g's and it forces the molten silver into the space where the wax tree was.
Then the red hot flask is dipped into cold water, which kind of 'explodes' the plaster off the silver.
The silver tree after the spent plaster was removed.
I made the connecting links by hand.

The new cast chain at the bottom and the old sample chain at the top.

To complete the cast chain, a Fold-over Clasp is made.
or select other projects from Jewelry Making Tutorials List
If you have any questions or wish to be notified of any new tutorials that are posted, email me.
This content is the intellectual property of Hans Meevis. More information on our Copyright and Privacy Policy