Online Jewelry Training Classes for Metalsmiths


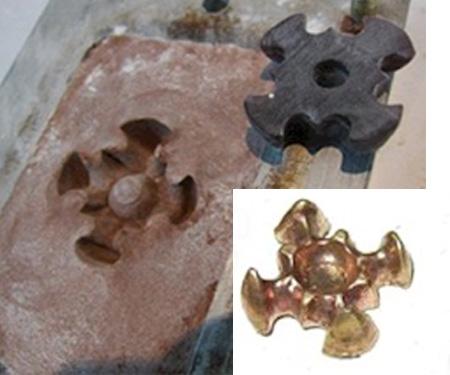
Delft clay casting is simply a different name for sand casting. This is a quick and easy method to cast jewelry pieces that don't require a highly detailed, highly finished form. For this demonstration I cast metal parts for a sculpture in brass.
The sand has been mixed with an oil, allowing it to keep it’s shape, much like a dough.
I have never had the need to use this system, because I am OK with spin casting.
With the Palindrome Cannon Sculpture project however, I don’t need that accuracy of casting a finely detailed model that spin casting provides.
Rather, I needed a quick rough and ready casting system that I cast 20 to 30 grams of metal in twenty minutes, modifying the piece as I go along from cast to cast until I’m happy.
And I also wanted to cast cartridge brass, because that’s what the Palindrome is made of.
So there is no colour difference.
I use one millimeter brass sheet. The off-cuts I recycle for the casting.
I had heard quite bad reports of casting sheet brass, but after a couple of casts I get the idea.
Unlike spin casting, where generally the temperature of the metal is married to the lowest fluidity point that will give you the level of detail you require, with cartridge brass ( 70% copper, 30% zinc ). I have found that the temperature to be as high as possible with a reducing flame, until the zinc JUST starts smoking.
What I also like about Delft clay casting is that it’s quite possible to cast a very rough wax, cast it and then finish the metal result off and that metal model becomes the master for the rest.
Metal masters are much nicer because you can bash them harder into the sand than wax.
Breaking a wax model when you pushing it into the sand is a major mission.
This free tutorial follows the same format as all my other free and premium tutorials. This gives you a good insight into the technical teaching methodology.
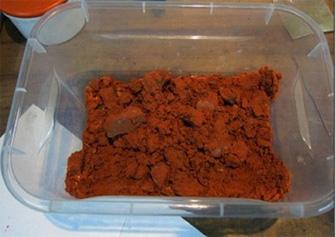
Sand casting smaller models / jewelry pieces it’s perfect. For larger pieces it becomes a bit more costly.
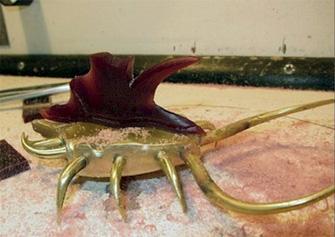
I used this sample for another project illustrating Delft Casting. Here the wax is being carved. I used Ferris purple carving wax because it’s hard and it’s a nice carving material.

I could have made a special frame, or bought a frame from the jewelry supply company. Instead I just used some vulcanizing frames I had lying around.
Here the sand is packed in and I have pushed the wax model into it.
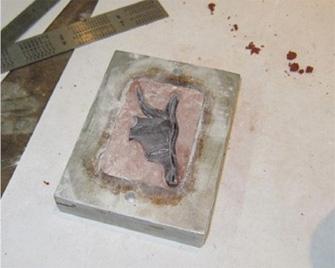
Use Talcum powder so nothing sticks.
I push with my fingers and tap it into place if the model is made out of metal.
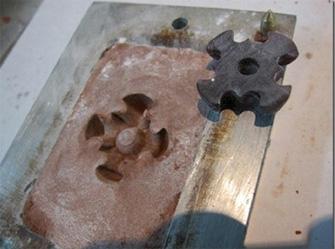
In this picture again another model, some of the corners of sand have broken off when I removed the wax model. This is because there were areas where the wax was not properly shaped for removal, so I modified them.
Delft sand casting does not allow for under cuts, unlike rubber moulds.
Also, the detail is not spectacular, so fancy engraving and fine detail is not possible.
Rather, what I am doing is to cast the basic shapes for the Palindrome Cannon Sculpture as I go along and then finish them off after casting.
For that purpose, I have found it exemplary.

I tap the top part down, not to hard, not to soft.
This was one of my first casts, so my locating pins were somewhat rough.

How not to use a steel ruler.
No worry, this one has been designated as sand trimmer, cheese cutter, screw driver, chisel and scraper. A secondary benefit is you can now see the size of the metal moulding frame.
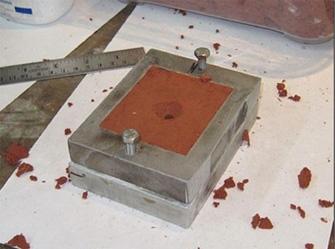
Normally I use a Stanley knife to carve a conical shape in the sand for the metal.
This was my first try and it was not very successful.
The mould did not fill all the way.

So then I made a kind of volcano shaped entry, and I also increased the sprue diameter to about ten millimeters.

This worked well, although I suspect that the increase of the diameter of the entrance from 7mm to 10mm had the most to do with success, rather than the volcano shape.
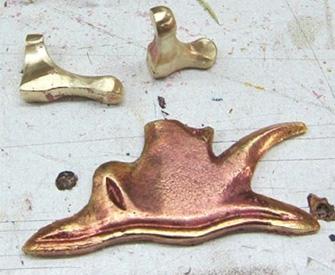
Anyway, on the project, I replaced the first one with the top two, which I also cast.

Here I only needed two copies, so I carved a wax model and cast two. The whole thing took about two hours, from wax carving to finish.
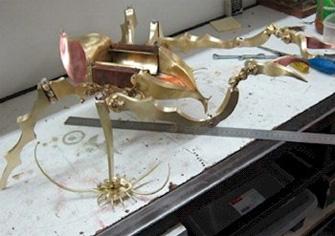
It holds the front gun platforms in place Reference 600mm ruler.

The green flame is from the Boric acid that I use as a flux. The torch flame looks hot in the picture, but actually is is a very reducing flame because of the zinc in the brass mixture.
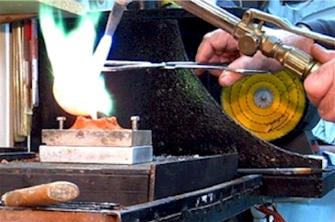
Casting the metal - check the green flame is still there, so my melt is still under flux as I cast.
Zinc cooks easy, so you got to look for a temperature where there is a little bit of smoke, and you swirling it in the crucible, and then a smooth gentle pour, all the while pulling the flame backwards.

After casting the metal a candle like flame burns.
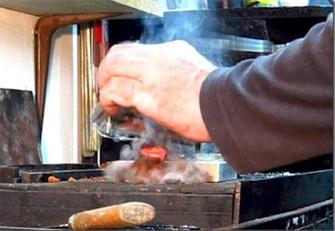
Then I tap the cast metal piece out of the top of the mould.

Flames and smokes a bit.

That’s the top of the mould with the button tapped through.
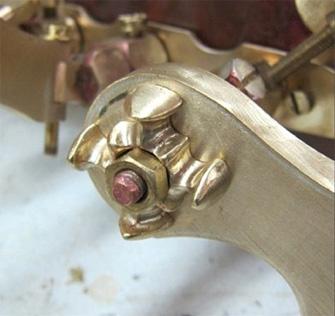
Here is a semi finished cast. It is still getting a thread tapped in, so the nut will not be needed.
Delft clay sand casting is a quick and cost effective way to reproduce metal parts for jewelry and other use. However keep in mind the loss of fine detail, limited under-cut design and high final finish comes as a trade-off.
As suppliment to this tutorial see the method in motion in this video on Sand Casting Jewelry - Delft Clay Part 1 showing the making of the sand mold and Sand Casting Jewelry - Delft Clay Part 2 that shows the pouring of hot metal into the delft clay mold.
or select other projects from Jewelry Making Tutorials List
If you have any questions or wish to be notified of any new tutorials that are posted, email me.
This content is the intellectual property of Hans Meevis. More information on our Copyright and Privacy Policy