Dearest friends and colleagues,
It is at this time, whilst days are short and dark, that we spend many hours behind our benches. We get to reflect on our growth, achievements and new goals.
Starting with Pearls of Wisdom to quote Coco Chanel - “A woman needs ropes and ropes of pearls.”
Not being left behind, collector's pearls reach heady heights on the auction floors.
Sotheby's statement: “Arguably the most important single strand of grey natural pearls ever to appear on auction, the Cowdray Pearls will be sold on 7 October during Sotheby's Hong Kong Magnificent Jewels and Jadeite Autumn Sale.”
News Update – The Cowdray Peals sold for a record breaking US$5.3 million
Pearls, like diamonds and gemstone will always form a main pillar of a person's jewelry collections. Often pearls will pass over your bench as a custom order.
Now, jewelry supply houses have a vast selection of pearl cup findings.
However, it is always good to become familiar with the making of pearl cups, especially for odd sizedsand shapes. What makes the cup finicky to work with, is holding the cup whilst working.
We've mentioned before in this jewelry tool tip - how to modify pliers - for the job.
All pearls that have a cup attachments, are held in with a pin and glue. The contact between the cup against the pearl gives added strength.
The one important aspect to consider is the surface area of the cup that is in contact with the pearl as illustrated below.
Ideal Cup Shape - pin length is variable.
Incorrect Cup Shape - not curved enough, glue will be visible and wrong cup proportions.
Okay Cup Shape - but not ideal as it is to curved, although the glue will take up the slack.
Okay Cup Shape – a bit too small, although this can be a variable, because the pin can be longer to add grip, allowing the cup to be smaller.
Here are a couple of tutorials for making jewelry with pearls -
This is a tool tip video on how file a pearl cup down and also soldering a pin to the pearl cup.
Another tutorial we've added, is the soldering of pins to attach relief objects such as letter or logo's on a flat surface. Particularly where it is difficult to solder the pin in such as enamel or with metals like titanium. This is an example of one of my designs with a dolphin being attached to the gold ring with a blued titanium plate in between the ring and the pinned object.
Expansion Of Our Tool Section

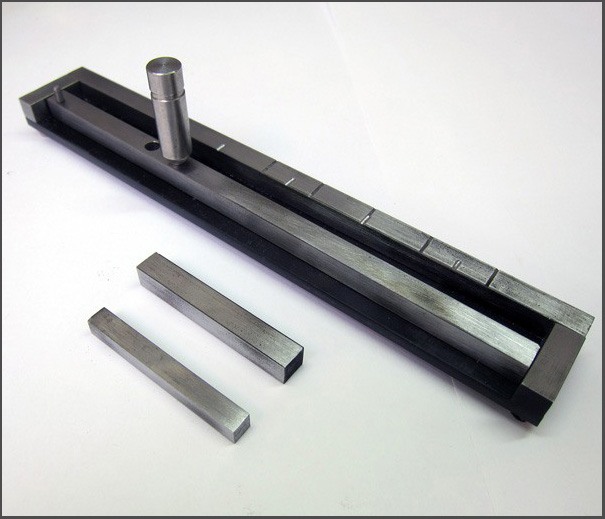
The new wire ingot mold.
Commercial ingot molds are heavy and need a lot of heat to bring them up to casting temperature. Casting a small amount of metal like 10 grams for instance, requires guess work and some form of stopper or 'dam' to contain the liquid metal. Often the metal is difficult to remove requiring banging the mold on the melting bench or a screwdriver to leverage the cast piece out.
My new design of ingot mold solves all those problems.
It heats up easily.
It is made to accommodate 95% of the metal amounts that are cast in the average workshop.
It has graduations that tell you exactly how much the metal will weigh after casting.
It has sliding stops that let you adjust the amount of metal that needs to be cast.
It casts tiny amounts of metal.
After casting the locking pin is removed and the stop bar shifted sideways to releases the cast metal from the mold completely.
All you need is your soldering tweezers to pick up the hot metal.
I personally hand-make and test each mold.
One of the lesser known finishing techniques that uses string to bring your jewelry piece up to the master level.
Check out my new video showing the thrumming technique, which is finishing and polishing difficult to reach areas such as in between collets, in between gallery work and polishing wire work. I also show how to prepare fine sand paper strips to use instead of string.
And then there is a video on sanding a brooch pin wire to a point.
The festive season is upon us. We hope you are reinvigorated by sharing special moments with friends and family and that pearls of laughter follow you this festive season.
My very warmest regards and wishing you happy holidays,
Hans Meevis
Previous Metalsmith Newsletter Editions